本文最后更新于:2024年3月20日 中午
前言
不知道同学们会不会有这样的烦恼:鼓起动力写脚本的时候,却发现官方文档的内容太零散,总是找不到自己想要的功能介绍;小白刚入门,还不会看源码,常常面对一大堆陌生的接口根本无处下手。
肯定要想办法把各种常用的接口给新手同学整得明明白白!接下来我们会连载几期的推文,尽量把Airtest和poco的各种API和设置给新手同学讲清楚, 另外每一个API和设置,我们都会附上示例方便同学们模仿学习 。(Airtest老司机可以自动跳过啦,或者先收藏起来以后可以查漏补缺用)
今天我们就先给同学们安排上Airtest 绝大部分API的功能和用法示例 ,包含以下4个方面:
1.脚本初始化接口
2.设备连接与使用相关的接口
3.操作应用相关的接口
4.常用的模拟操作
1
脚本初始化接口
1).air脚本:auto_setup() 自动配置运行环境的接口,可以配置当前脚本所在路径、使用的设备、log内容的保存路径、项目根目录和截图压缩精度:
auto_setup(basedir=None , devices=None , logdir=None , project_root=None , compress=None )
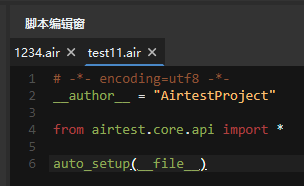
新建 .air 脚本时,会自动插入这个脚本初始化接口:
图中的 auto_setup 接口表示,当前脚本所在路径为变量 __file__ ,并且尝试连接第一台安卓设备。(不填入设备参数的情况下,都是尝试连接第一台安卓设备)。
接口的其它示例:
1 auto_setup(__file__, devices=["android://127.0.0.1:5037/emulator-5554?cap_method=JAVACAP&&ori_method=MINICAPORI&&touch_method=MINITOUCH" ], logdir=True , project_root=r"D\test" , compress=90 )
接口的api文档链接:https://airtest.readthedocs.io/zh\_CN/latest/all\_module/airtest.core.api.html#airtest.core.api.auto\_setup
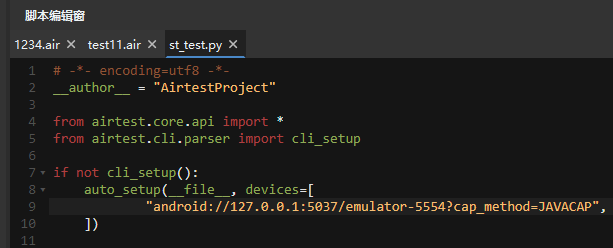
2).py脚本:cli_setup() 在IDE新建 .py 脚本时,会自动在脚本中插入如下的初始化接口:
上面这段代码的意思是说,当使用 python xx.py 来运行本文件,且不带任何命令行参数时,则 if not cli_setup() 的判断成立,自动使用 auto_setup 这个接口来对运行环境进行初始化。这样只需要在写 .py 脚本时,在 auto_setup() 里填写好指定的参数就能直接用 python xx.py 指令来运行脚本了。
同时,传统的 airtest run xx.air –-devices Android:/// 命令行运行方式也不受影响,只要脚本检测到传入了命令行参数(即代码中的 if not cli_setup() 判断不成立,不走到里面的 auto_setup() 初始化去),就依然优先使用命令行参数来初始化脚本运行环境的相关配置项。
2
设备连接与使用相关的接口
1)连接设备:connect_device(URI) 连接设备的接口,需要传入用于初始化设备的URI字符串,示例:
1
2
3
4
5
6
7
8
连接安卓设备 "Android://127.0.0.1:5037/SJE5T17B17" ) "iOS:///127.0.0.1:8100" ) "Windows:///123456" ) "Android://127.0.0.1:5037/127.0.0.1:62001?cap_method=JAVACAP&&ori_method=ADBORI" )
接口的api文档链接:https://airtest.readthedocs.io/zh\_CN/latest/all\_module/airtest.core.api.html#airtest.core.api.connect\_device
2)连接设备:init_device() 初始化设备的接口,需要传入设备平台、设备的uuid和可选参数等,其中uuid为,Android的序列号,Windows的窗口句柄,或iOS的uuid:
1 `init_device(platform='Android' , uuid=None , **kwargs) `
接口使用示例:
1 2 3 "Android" ,uuid="SJE5T17B17" ,cap_method="JAVACAP" ) "Windows" ,uuid="123456" )
接口的api文档链接:https://airtest.readthedocs.io/zh\_CN/latest/all\_module/airtest.core.api.html#airtest.core.api.init\_device
3)获取当前设备:device() 返回当前正在使用中的设备实例,用法示例如下:
1 dev = device() dev.swipe_along([[959 , 418 ],[1157 , 564 ],[1044 , 824 ],[751 , 638 ],[945 , 415 ]])
4)设置当前设备:set_current() 设置当前的使用设备,可以用于在多设备之间切换使用,示例如下:
1 2 3 4 0 ) set_current(1 ) "serialno1" ) set_current("serialno2" )
接口的api文档链接:https://airtest.readthedocs.io/zh\_CN/latest/all\_module/airtest.core.api.html#airtest.core.api.set\_current
PS:关于设备连接的详细教程,推荐大家阅读 用1行代码搞定自动化测试的设备连接问题 ;利用设备切换实现多机协作的案例,推荐大家阅读 “多机协作”–微信互加好友案例分析 。
3
操作应用相关的接口
1)启动应用:start_app() 在设备上启动目标应用,需传入应用的包名,支持Android和iOS平台,示例:
1 start_app("com.netease.cloudmusic" )
接口的api文档链接:https://airtest.readthedocs.io/zh\_CN/latest/all\_module/airtest.core.api.html#airtest.core.api.start\_app
2)终止应用运行:stop_app() 在设备上终止目标应用的运行,需传入应用的包名,支持Android和iOS平台,示例:
1 stop_app("com.netease.cloudmusic" )
接口的api文档链接:https://airtest.readthedocs.io/zh\_CN/latest/all\_module/airtest.core.api.html#airtest.core.api.stop\_app
3)清除应用数据:clear_app() 清理设备上的目标应用数据,需传入应用的包名,仅支持Android平台 ,示例:
1 clear_app("com.netease.cloudmusic" )
4)安装应用:install() 安装应用到设备上,需传入完整的apk的安装路径,仅支持Android平台,示例:
1 install(r"D:\demo\tutorial-blackjack-release-signed.apk" )
接口的api文档链接:https://airtest.readthedocs.io/zh\_CN/latest/all\_module/airtest.core.api.html#airtest.core.api.install
5)卸载应用:uninstall() 卸载设备上的应用,需传入被卸载应用的包名,仅支持Android平台,示例:
1 uninstall("com.netease.cloudmusic" )
接口的api文档链接:https://airtest.readthedocs.io/zh\_CN/latest/all\_module/airtest.core.api.html#airtest.core.api.uninstall
PS:安装卸载应用的实例教程,推荐阅读推文 如何解决“自动装包”过程中oppo、vivo等手机需要输入密码的问题
4
常用的模拟操作
1)截图:snapshot() 对目标设备进行一次截图,并且保存到文件中,可以传入截图文件名、截图的简短描述、截图压缩精度和截图最大尺寸,示例如下:
1 snapshot(filename="123.jpg" ,msg="首页截图" ,quality=90 ,max_size=800 )
接口的api文档链接:https://airtest.readthedocs.io/zh\_CN/latest/all\_module/airtest.core.api.html#airtest.core.api.snapshot
2)点击:touch() 在设备上进行点击操作,可以传入点击位置、点击次数等参数,不同平台下的可选参数稍有不同,示例如下:
1 2 3 4 5 6 7 8 100 ,100 ]) r"tpl1606730579419.png" , target_pos=5 , record_pos=(-0.119 , -0.042 ), resolution=(1080 , 1920 ))) 100 ,100 ],times=2 ) 100 ,100 ],duration=2 ) `
接口的api文档链接:https://airtest.readthedocs.io/zh\_CN/latest/all\_module/airtest.core.api.html#airtest.core.api.touch
PS:关于 touch 接口的教程详情,推荐阅读推文 学会这些,你想怎么touch就怎么touch
3)滑动:swipe() 在设备上进行滑动操作,有2种传参方式,一种是传入滑动的起点和终点,一种是传入滑动的起点和滑动方向vector,示例如下:
1 2 3 4 5 6 378 , 1460 ],[408 , 892 ]) r"tpl1606814865574.png" , record_pos=(-0.322 , 0.412 ), resolution=(1080 , 1920 )), vector=[-0.0316 , -0.3311 ]) 378 , 1460 ],[408 , 892 ],duration=1 )
接口的api文档链接:https://airtest.readthedocs.io/zh\_CN/latest/all\_module/airtest.core.api.html#airtest.core.api.swipe
PS:关于 swipe 接口的教程详情,推荐阅读推文 你的swipe接口用不好,是因为…
4)输入:text() 在设备上输入文本,文本框需要处于激活状态(即先点击文本框,再使用text()接口进行输入)。示例如下:
1
2
3
4
5
touch(文本框的Template实例) "输入的文本" ) "123" ,enter=False )
接口的api文档链接:https://airtest.readthedocs.io/zh\_CN/latest/all\_module/airtest.core.api.html#airtest.core.api.text
PS:关于 text 接口的教程详情,推荐阅读推文 手把手教你学会文本输入的text()接口
5)等待时间:sleep() 设置等待时间,默认为1秒,常用于连续的操作之间,防止设备画面未来得及切换就已经开始执行下一步操作,示例:
1 touch([100 ,100 ]) sleep(3.0 ) touch([200 ,200 ])
6)等待截图出现:wait() 等待当前画面上出现某个匹配的 Template 图片,常用于等待某一张图片出来之后,再进行下一步操作,可以传入等待的超时时长、查找的时间间隔和首次尝试查找失败的回调函数,示例:
1
2
3
4
def test ():print ("未等待到目标" )r"tpl1606821804906.png" , record_pos=(-0.036 , -0.189 ), resolution=(1080 , 1920 )),timeout=120 ,interval=3 ,intervalfunc=test)
接口的api文档链接:https://airtest.readthedocs.io/zh\_CN/latest/all\_module/airtest.core.api.html#airtest.core.api.wait
7)检查存在:exists() 检查当前设备画面上是否存在目标截图,常和判断语句一起使用,示例:
1
2
if exists(Template(r"tpl1606822430589.png" , record_pos=(-0.006 , 0.069 ), resolution=(1080 , 1920 )))r"tpl1606822430589.png" , record_pos=(-0.006 , 0.073 ), resolution=(1080 , 1920 )))
接口的api文档链接:https://airtest.readthedocs.io/zh\_CN/latest/all\_module/airtest.core.api.html#airtest.core.api.exists
8)查找目标:find_all() 在设备屏幕上查找所有出现的目标并返回其坐标列表,示例:
1
2
3
4
a= find_all(Template(r"tpl1606822767366.png" , record_pos=(-0.034 , -0.184 ), resolution=(1080 , 1920 )))print ("************************" )print (str (a))
接口的api文档链接:https://airtest.readthedocs.io/zh\_CN/latest/all\_module/airtest.core.api.html#airtest.core.api.find\_all
9)按键事件:keyevent() 在设备上执行keyevent按键事件,不同平台下支持的keyevent差别比较大,请同学们按照具体平台的支持情况来使用,常用的keyevent如下:
1 2 3 4 5 6 7 8 9 10 "HOME" )"BACK" )"KEYCODE_DEL" )"{DEL}" )"HOME" )
接口的api文档链接:https://airtest.readthedocs.io/zh\_CN/latest/all\_module/airtest.core.api.html#airtest.core.api.keyevent
PS:各平台下keyevent的使用规则和支持详情请参考推文 超详细!各大平台的keyevent()解析
10)唤醒屏幕:wake() 唤醒并解锁目标设备,仅支持安卓平台,并且在部分品牌手机上可能无法生效,示例:
11)返回HOME:home() 返回HOME界面,支持Android和iOS平台,示例:
(呀!这么认真都看到这里啦,评论一下呗灰常感谢)