静态博客部署 Hexo + Netlify-CMS + Vercel (在线构建)
本文最后更新于:2024年3月20日 中午
前言
静态博客部署 Hexo + Netlify-CMS + Vercel (在线构建)
目录
引入
背景
Hexo等静态博客相对于Wordpress等动态博客,可以白嫖很多免费部署服务,不需要博主自行维护服务器,同时借由CDN的分发,不受服务器地理位置和计算能力的限制,访问更快速。但静态博客需要在本地维护npm环境,进行构建部署流程较动态博客更为繁琐。
Netlify-CMS是一个开源的静态博客编辑组件,可以与多种自动构建部署服务商搭配使用
Netlify是一家自动构建部署服务商,Netlify-CMS在Netlify上结合使用最为简单
Netlify等自动构建部署的免费服务基于Git管理,让静态博客可以免本地环境运行,但基于Git的管理让博客的编辑过程过于繁琐。另外,Netlify在大陆地区经常性无法访问或速度极慢,若同步至Github Pages也面临周期性抽风的问题。Vercel在大陆绝大部分地区的访问速度较快,相比直接在Netlify或Github Page上部署是更好的选择。
Netlify-CMS作为Headless CMS,可以添加在Hexo等静态博客项目中,链接到静态博客的Git源码项目,以提供近似动态博客的在线编辑体验。
然而想要为静态博客添加Netlify-CMS,最简单的方式是直接使用Netlify构建,如果不使用Netlify的构建服务而寻求Vercel等第三方的构建服务,则配置极为繁琐,从零开始熟练操作也需12小时,对于初次接触Hexo/Netlify-CMS/Vercel/npm的人来说,完成第一次完美部署至少也需12天研究。
本文是为了给自己和有类似需求的人提供从零开始可轻松遵循的教程,每一步的步骤非常详细,并提供有校验避免某一步出错,同时便于将这一过程在Hugo等其他博客上复现。
如果想要遵循本文步骤,在动手实践前请认真阅读几遍。另外本文结尾提供了构建模板,如果不想从零开始,可以使用模板快速部署自己的博客。
本方案为Hexo+Netlify-CMS+Vercel,具体优势为:
- 完全免费,也无需自行维护服务器
- 静态博客,访问时无渲染时间,可经CDN加速
- 就像动态博客一样支持在线编辑
- 不需要维护本地环境,任何设备都可以随处编辑,并自动构建、部署
- 免备案
- Vercel CDN在大陆地区访问速度较快
- Vercel提供
https://<domain>.vercel.app/格式的免费域名,绑定第三方域名也非常简单,同时默认支持自动申请维护Let’s Encrypt的SSL证书,直接支持https访问 - 整个教程可以无命令行输入,无环境配置即可完成
另提供Academia学术主题教程,可移步另一篇文章
方案
- 博客框架:Hexo
- 在线编辑框架:Netlify CMS
- 自动构建部署:Vercel
- 域名:Namesilo
- SSL证书:Vercel提供
- 自定义404页面
教程复杂,细节较多,因此校验步骤较多。建议实操前全文阅读数遍,有信心的读者可以略过校验步骤。
步骤
生成starter模板
- 进入https://www.staticgen.com/,选择Hexo处的
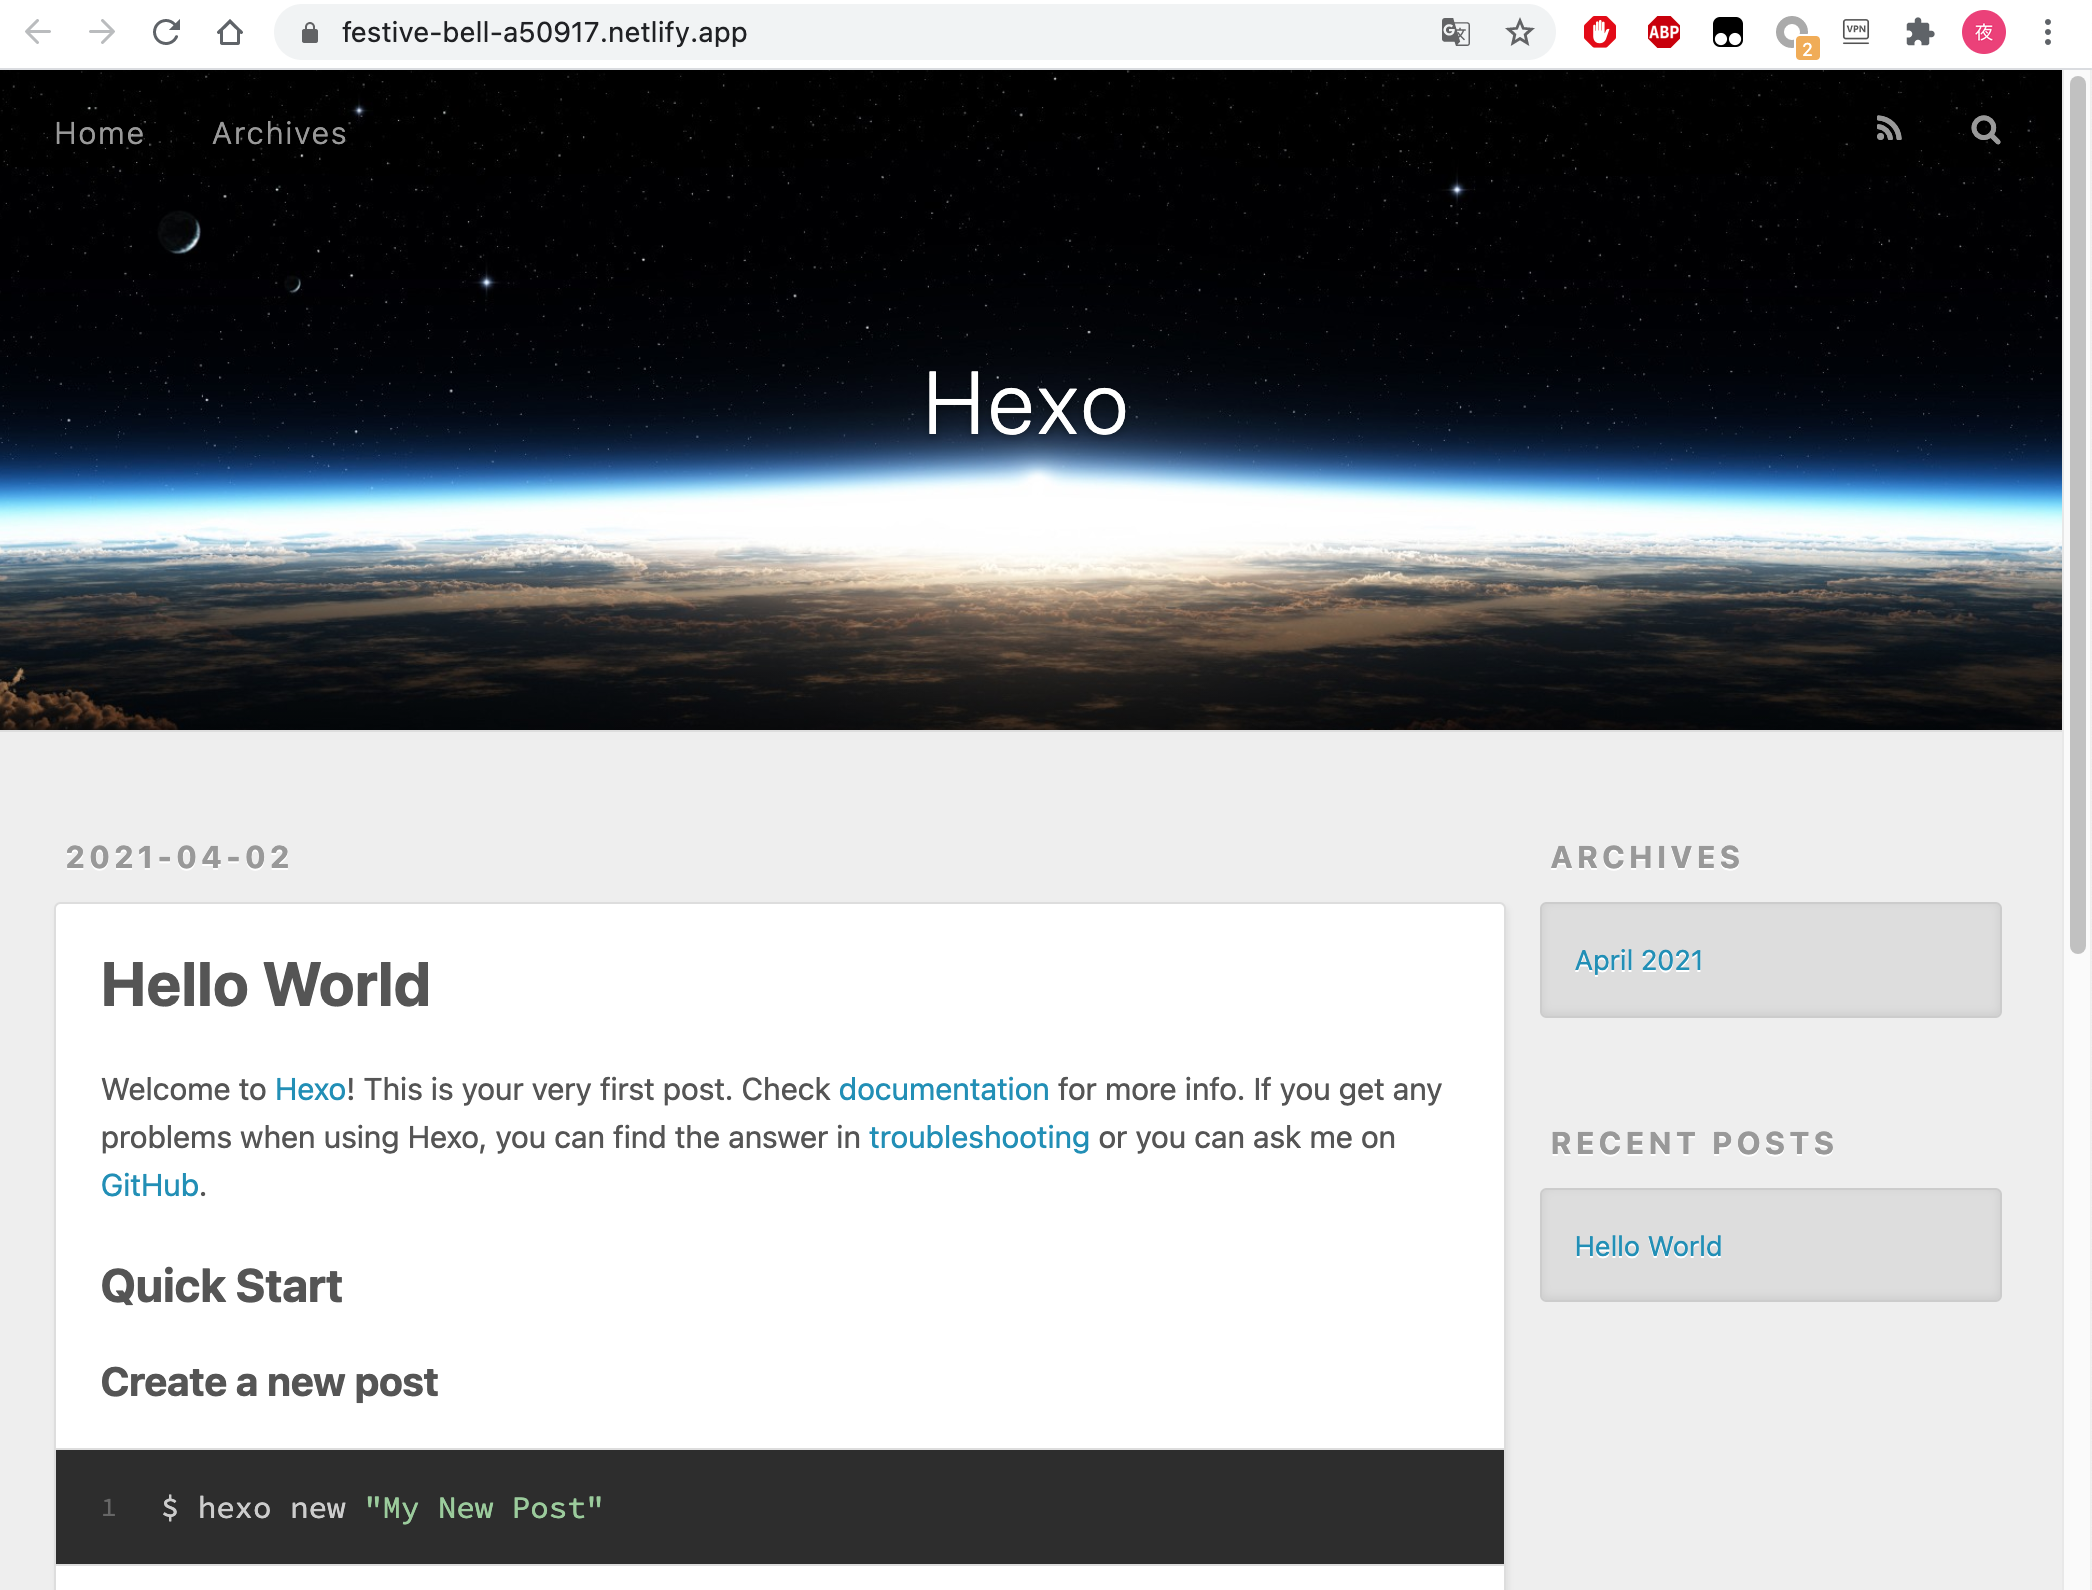
Deploy to Netlify,登录Netlify,如无帐号则Github授权登录注册,其他方式据称有bug - 登录Netlify后,为Netlify授权Github。Netlify会自动将Hexo模板fork到自己的Github仓库中,并自动授权关联Netlify App自动参与构建。之后在 https://netlify.com/ 主页可以看到已经部署到Netlify的博客主页
添加Netlify CMS在线管理
首先在Netlify里添加Netlify CMS,测试成功后再迁移至Vercel
参考 https://www.netlifycms.org/docs/add-to-your-site/
在Github仓库的source目录下创建admin目录:
1 | |
index.html内容:
1 | |
config.yml内容,注意这里可能会根据你的模板所改变
1 | |
并修改仓库根目录的_config.yml,跳过对source/admin的渲染,否则source/admin/config.yml会于发布时丢失。在_config.yml中修改为:
1 | |
等待netlify自动构建完成后,这时打开https://<domain>.netlify.app/admin/
应为密码输入界面。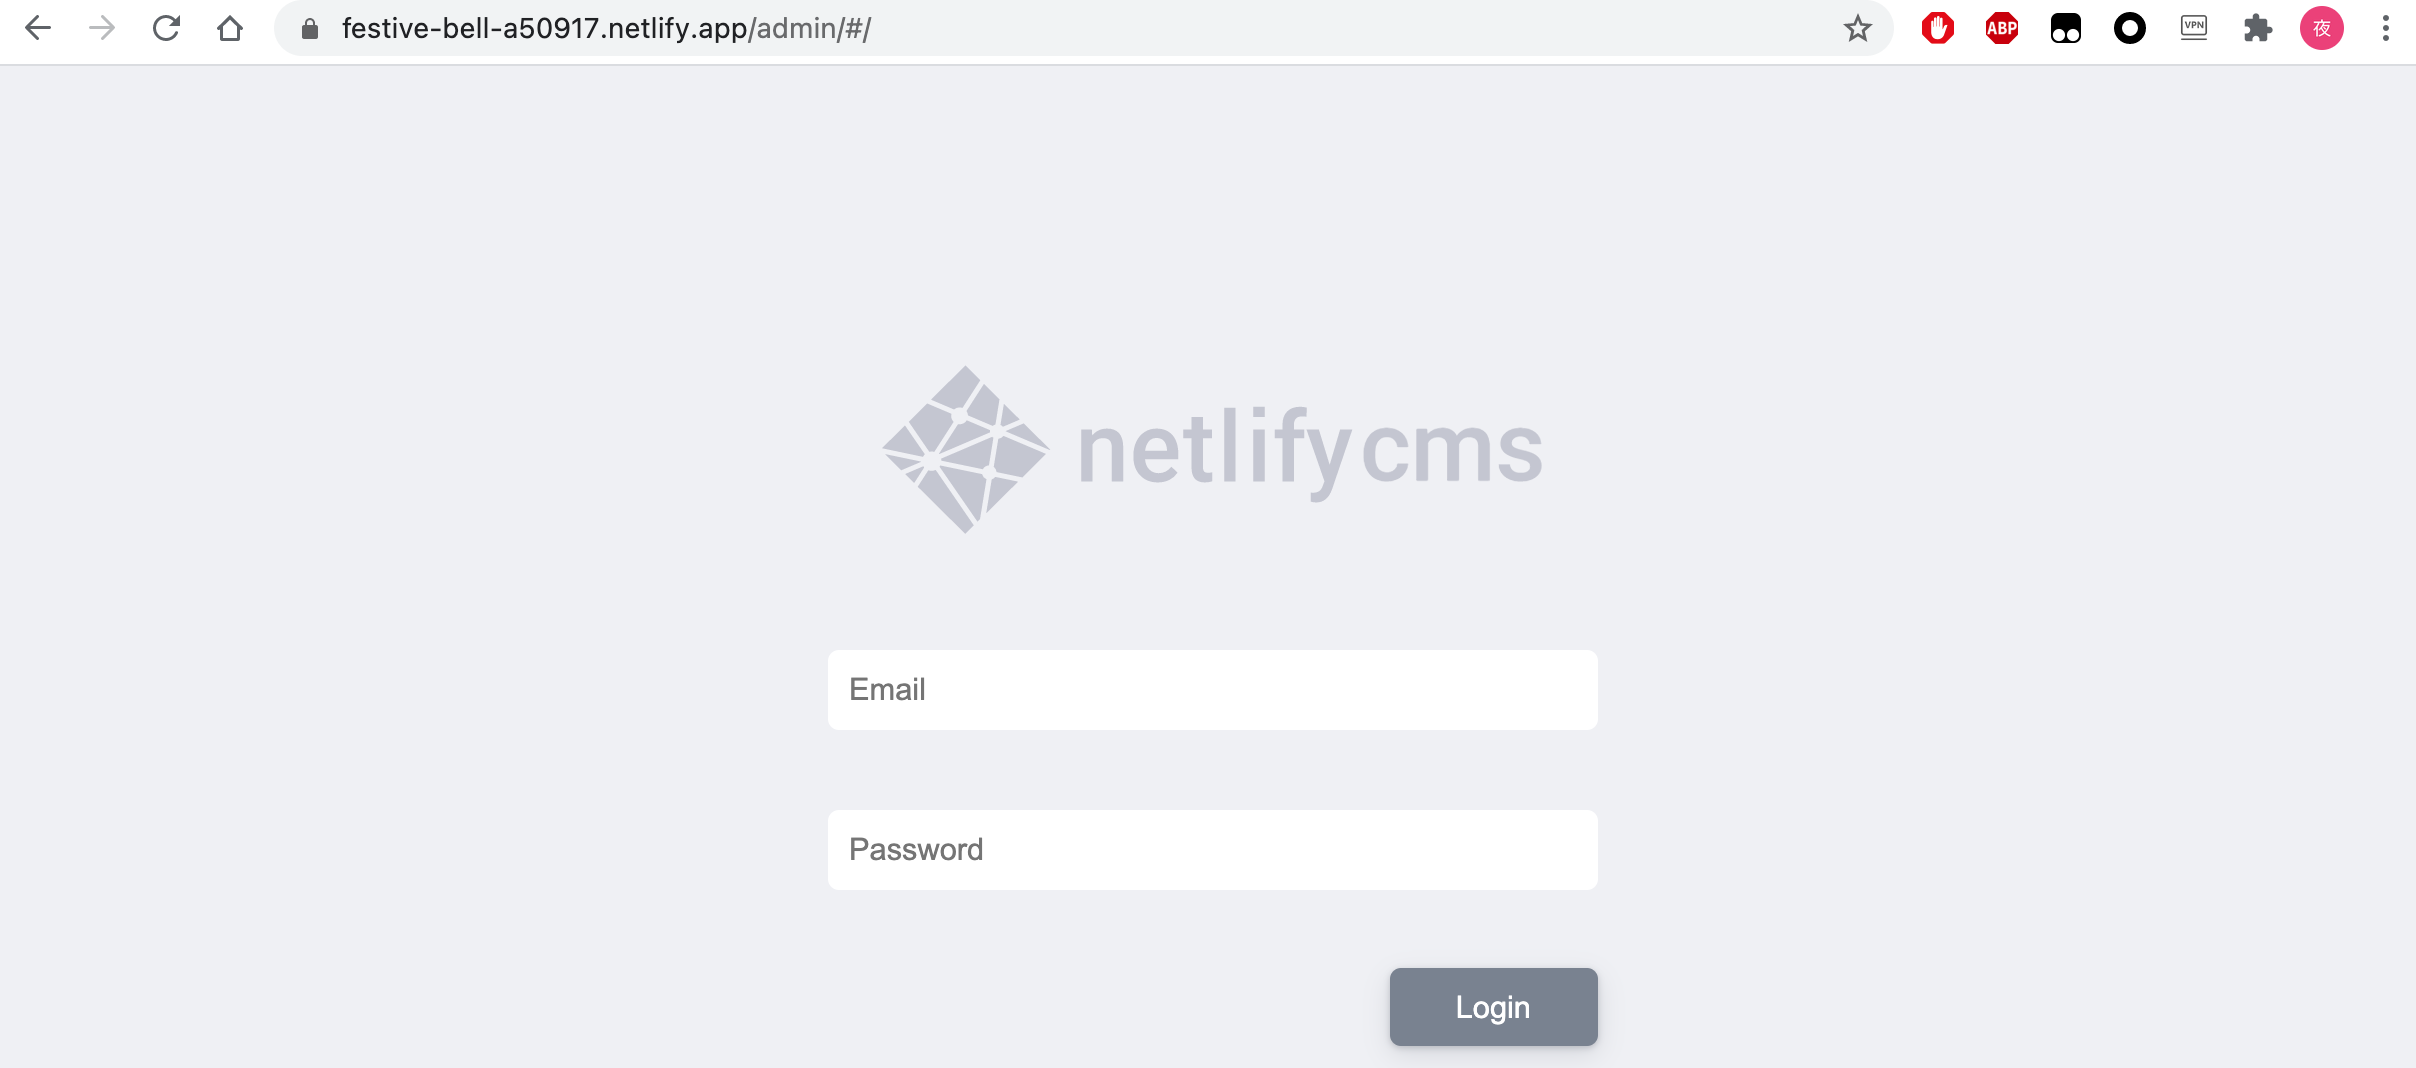
添加Netlify身份验证组件
参考 https://www.netlifycms.org/docs/add-to-your-site/#add-the-netlify-identity-widget
依次进入app.netlify.com >> 选择自己的网站 >> Site settings >> Build & Deploy >> Post processing >> Snippet Injection section >> Add Snippet
Before</head>填写
1 | |
Before</body>填写
1 | |
Github仓库提交一次无谓的修改(如加一行空格)触发自动构建
之后进入https://<domain>.netlify.app/admin/,之前的用户名密码就会变成登录按钮,点击按钮会向https://<domain>.netlify.app/.netlify/发送一条请求并报错,这是因为还没有开启netlify的身份验证功能。
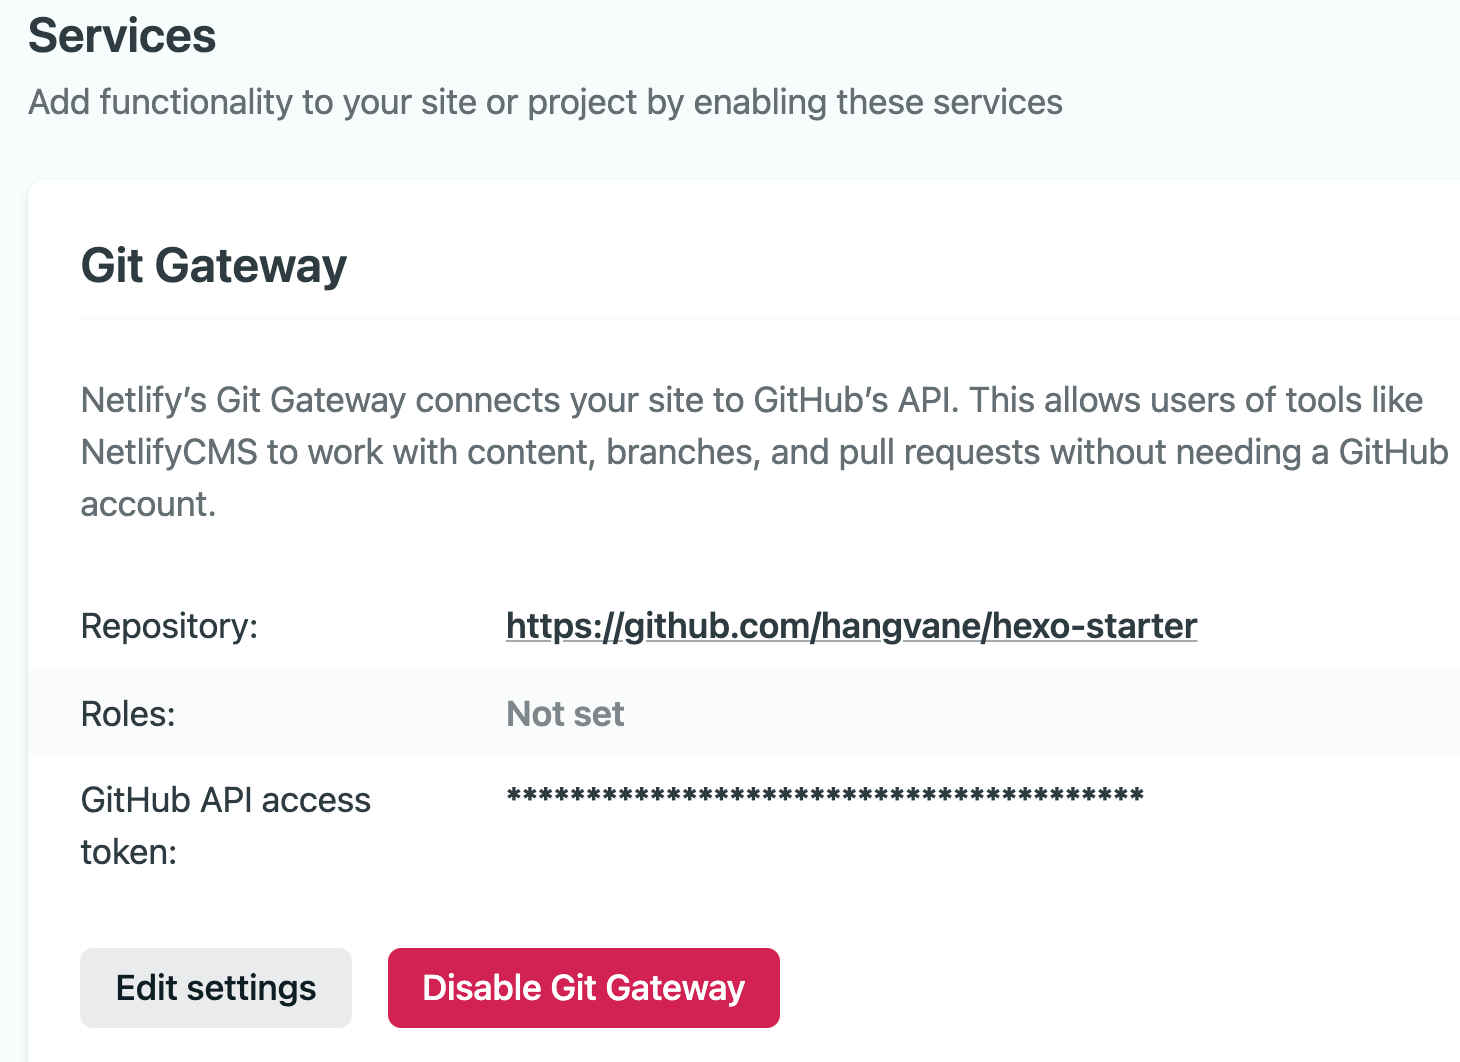
启用git gateway身份验证
依次进入
app.netlify.com>> 自己的网站 >>Identity>>Enable IdentitySite Settings>>Identity>>Registration>>OpenExternal providers>> 添加GithubSite settings>>Identity>>Services>>Git Gateway>>Enable Git Gateway>> 选择对应的Github仓库
即可使用Github身份登录了,尝试编辑下文章并点击右上角的publish,等待部署完毕后刷新,可以查看到修改的内容。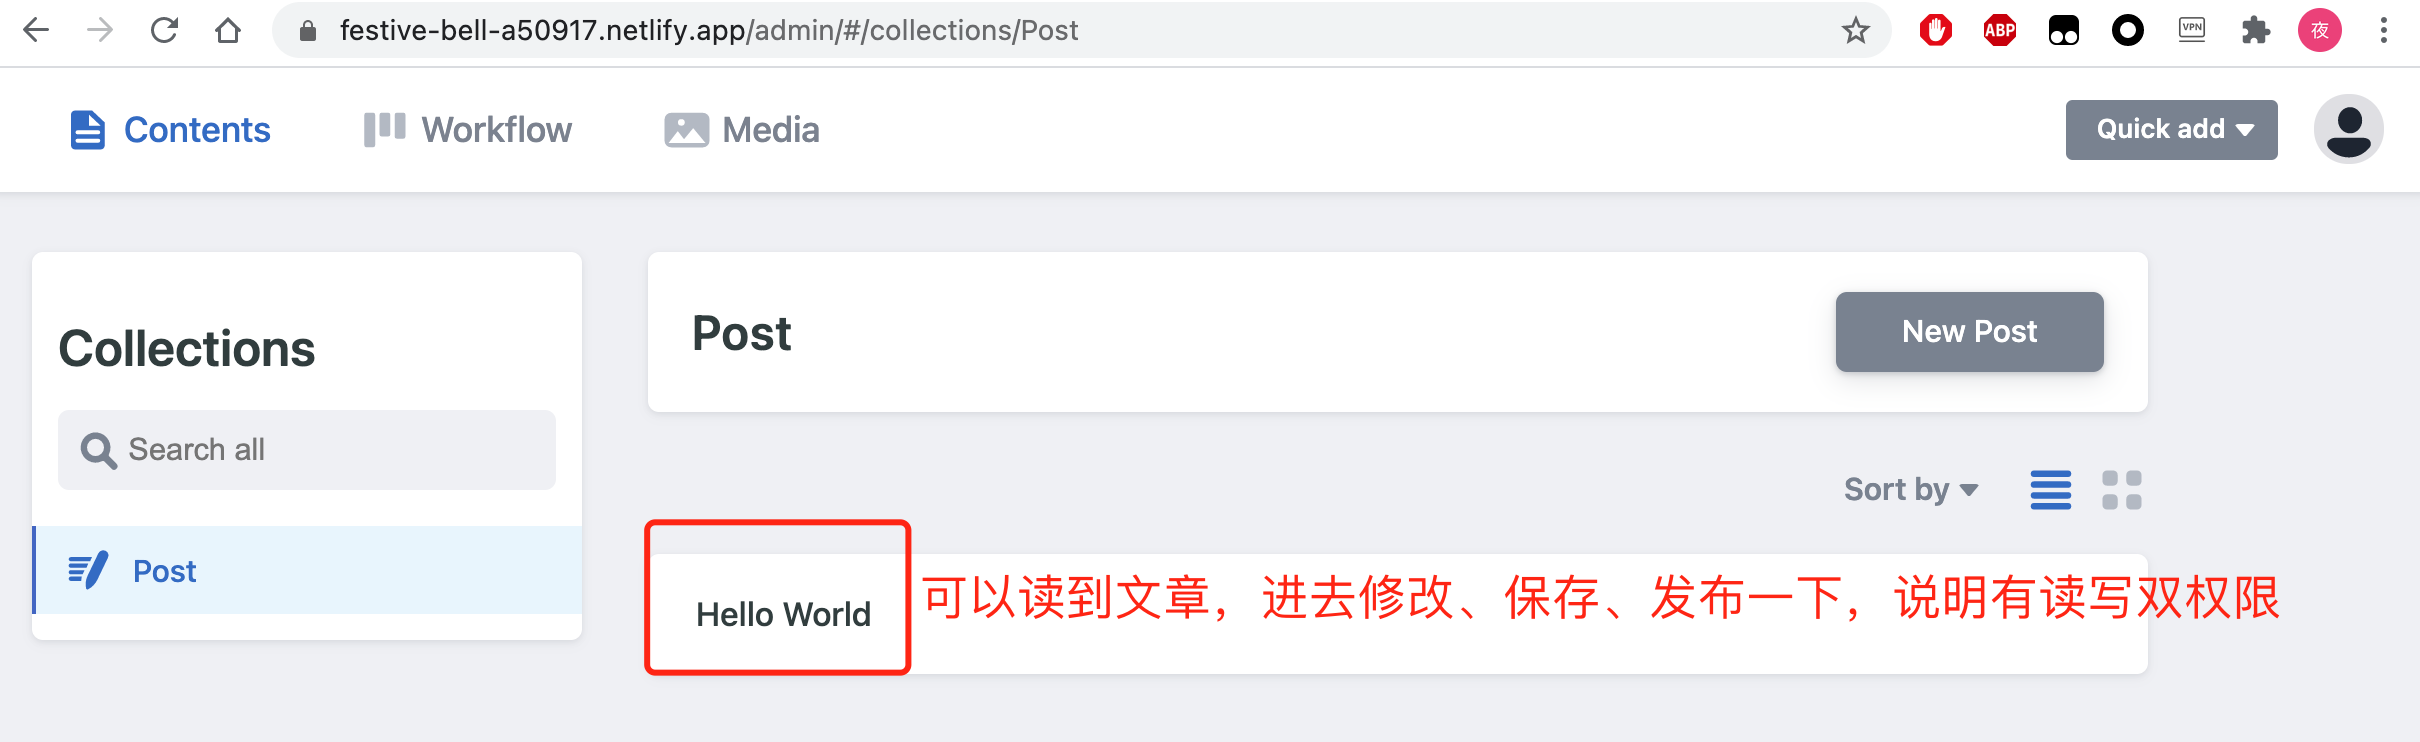
换用Vercel作为CDN
参考:
https://zhuanlan.zhihu.com/p/56319868
https://github.com/ublabs/netlify-cms-oauth
https://www.netlifycms.org/docs/add-to-your-site/#add-the-netlify-identity-widget
重新添加js
这里建议下载Github仓库并新建上传,从而避免仓库中有太多contributers,也可设为私人仓库。注意如果新建仓库将主分支由master切换到了main,则source/admin/config.yml的分支配置也要对应修改。
前往https://vercel.com/new让Vercel进行自动构建。
会得到新的发布链接https://<domain>.vercel.app/
此时访问https://<domain>.vercel.app/admin/(对于Vercel部署的网站,网址这里必须有最后一个/,否则会跳转错误无法访问),又显示为用户名密码登录。
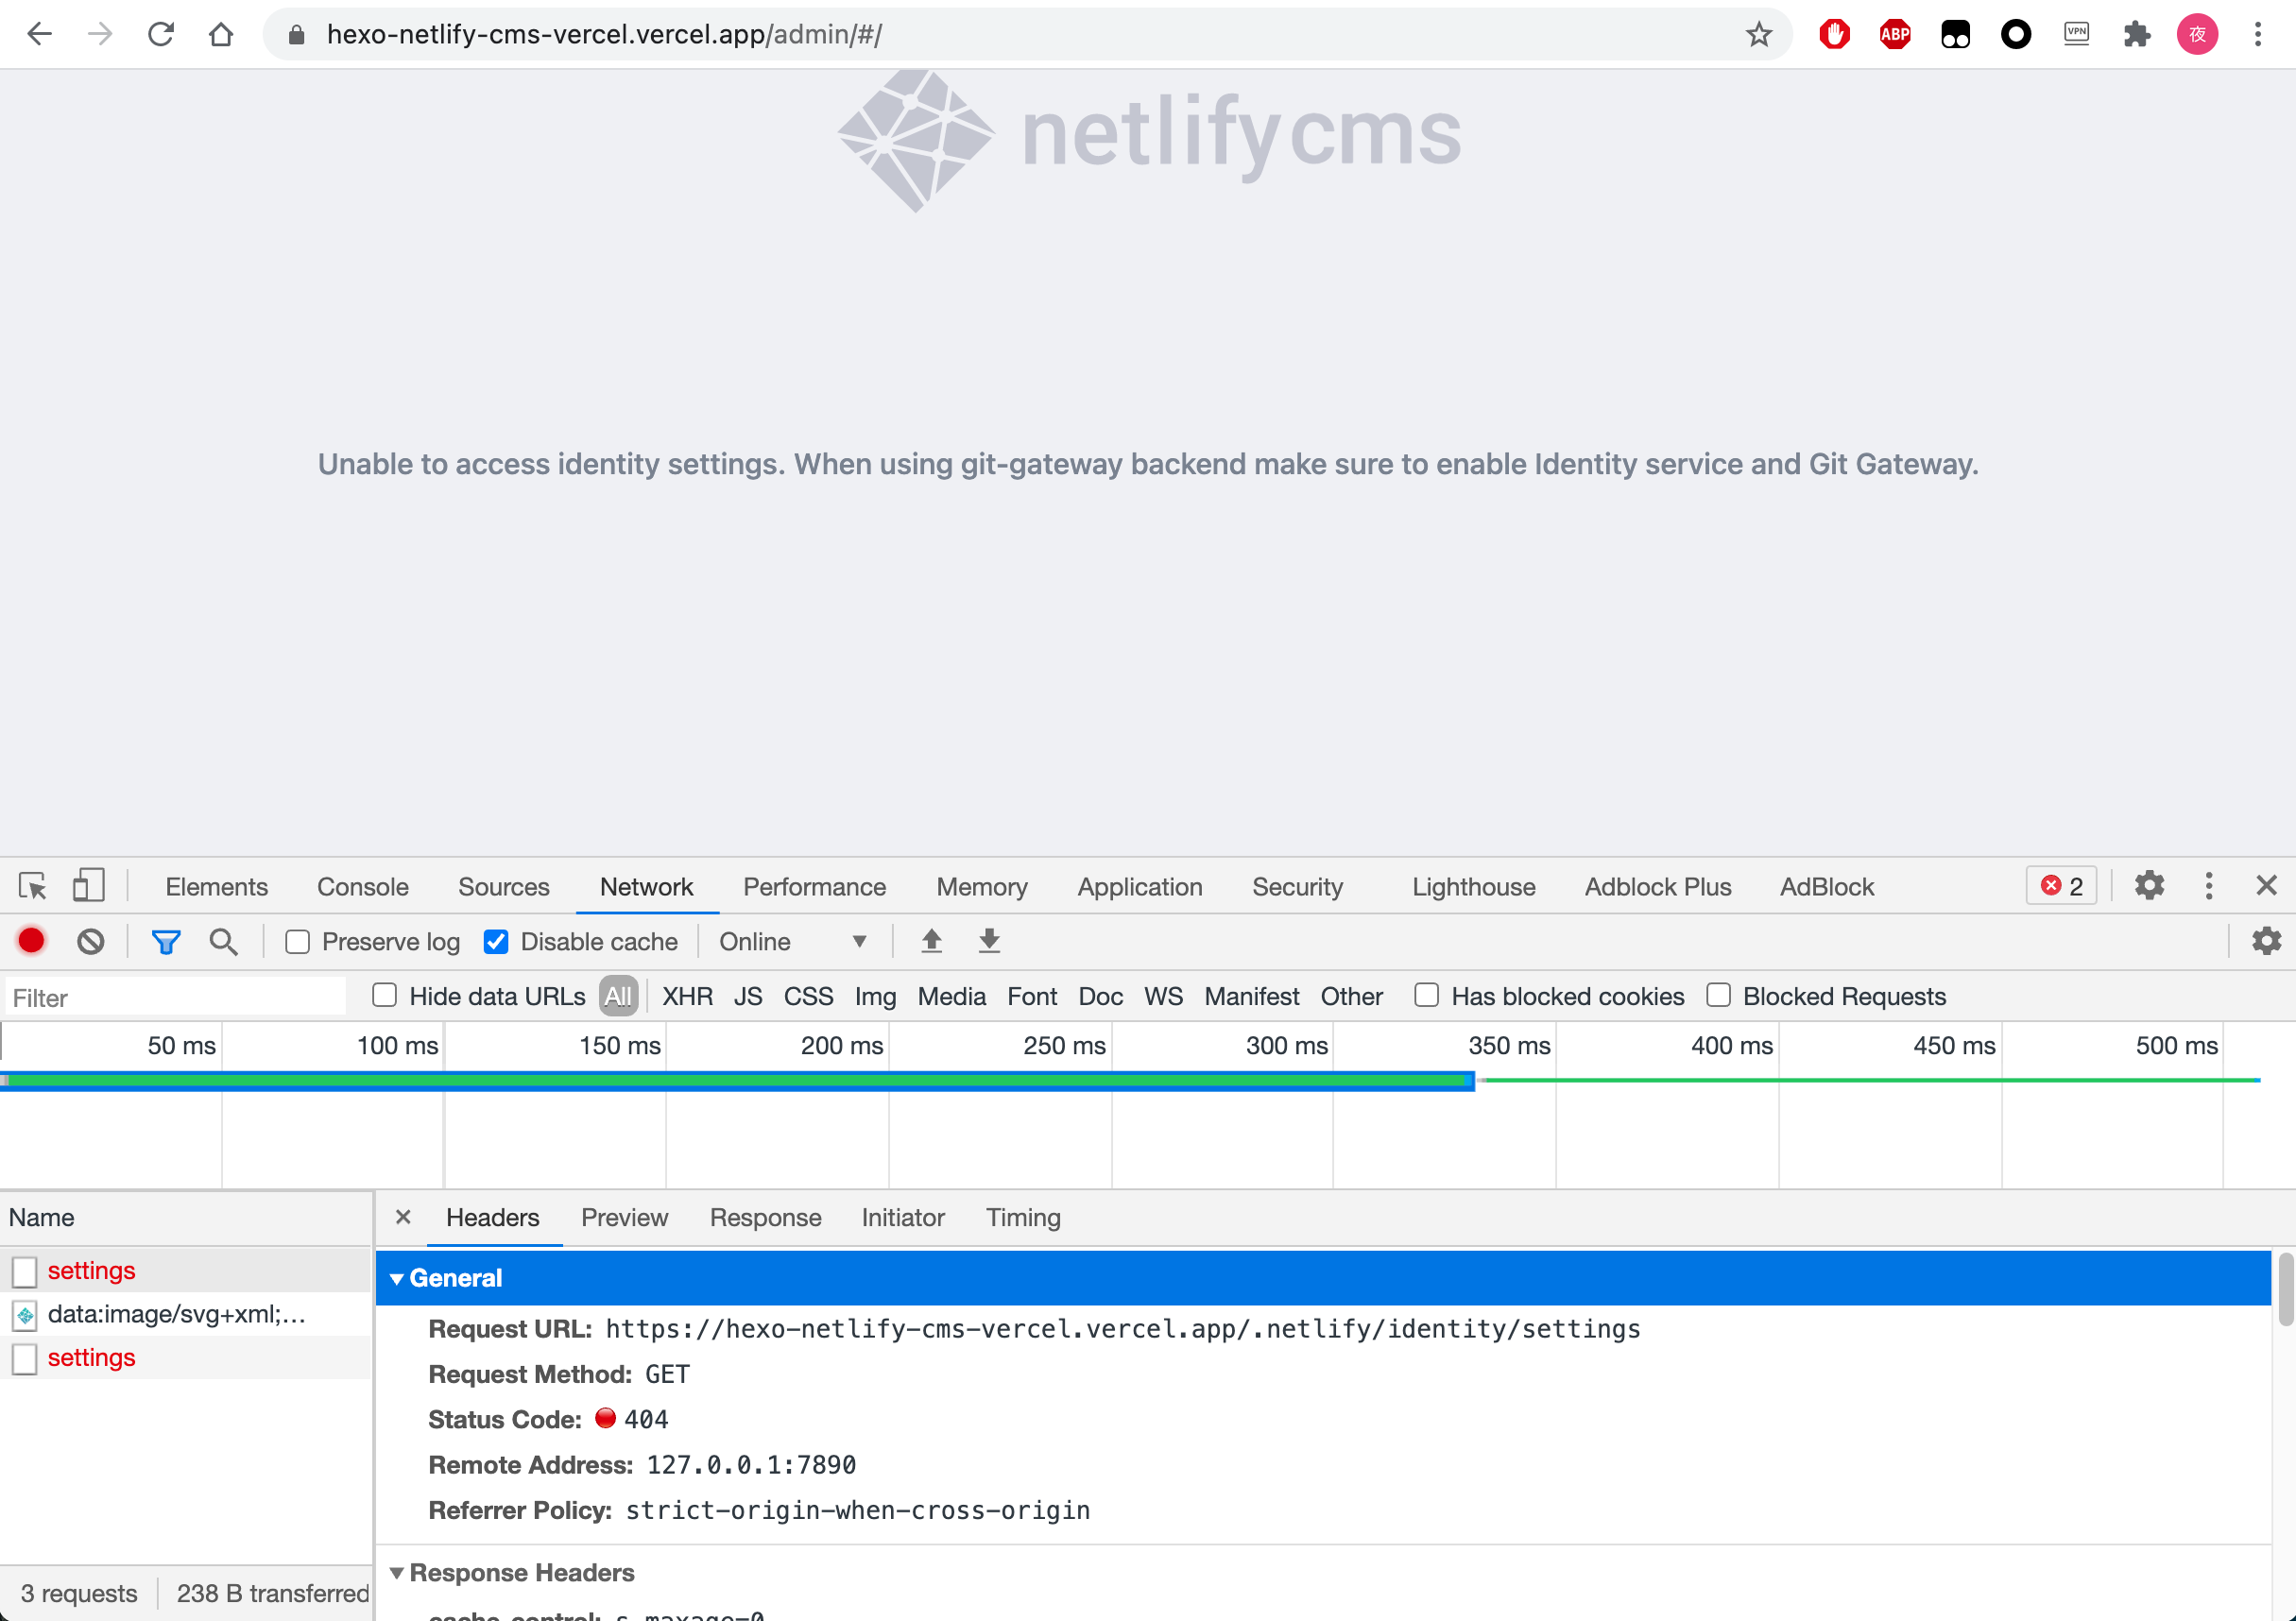
这是因为换为Vercel,无法使用Netlify才有的Snippet Injection功能,需要手动向源代码模板中添加上述代码,
在source/admin/index.html里的</head>前添加:
1 | |
经测试,针对网站首页的js无需添加。
之后去admin尝试登录一下,界面仍然是一个登录按钮,且按下登录按钮,开发者工具网络拦截到https://<domain>.vercel.app/.netlify的404请求说明正常
添加身份验证器
现在修改为Vercel部署。使用下面的代码作为serverless身份验证器:
首先按照readme,修改source/admin/config.yml为对应的内容,如我的则是
1 | |
上传后测试一下,此时admin点登录后会弹出https://<domain>.vercel.app/auth的404页面,说明配置已经正确,只是还未上传身份验证器,所以无法访问serverless函数帮助完成登录过程

上传身份验证器:
合并package.json:将验证器仓库中的package.json和自己的Github仓库中的依赖进行合并,即添加simple-oauth2添加至dependencies,将@types/node和@types/simple-oauth2添加至devDependencies
同时复制vercel.json,api文件夹,lib文件夹,将这三个文件上传到自己的Github仓库中,等待自动构建完成后再进行验证:
此时点击登录,会弹出一个Github的404错误界面https://github.com/login/oauth/xxx,且url中含有一个空的id=参数,说明当前步骤正确,只差最后一步绑定Github oauth的ID和Secret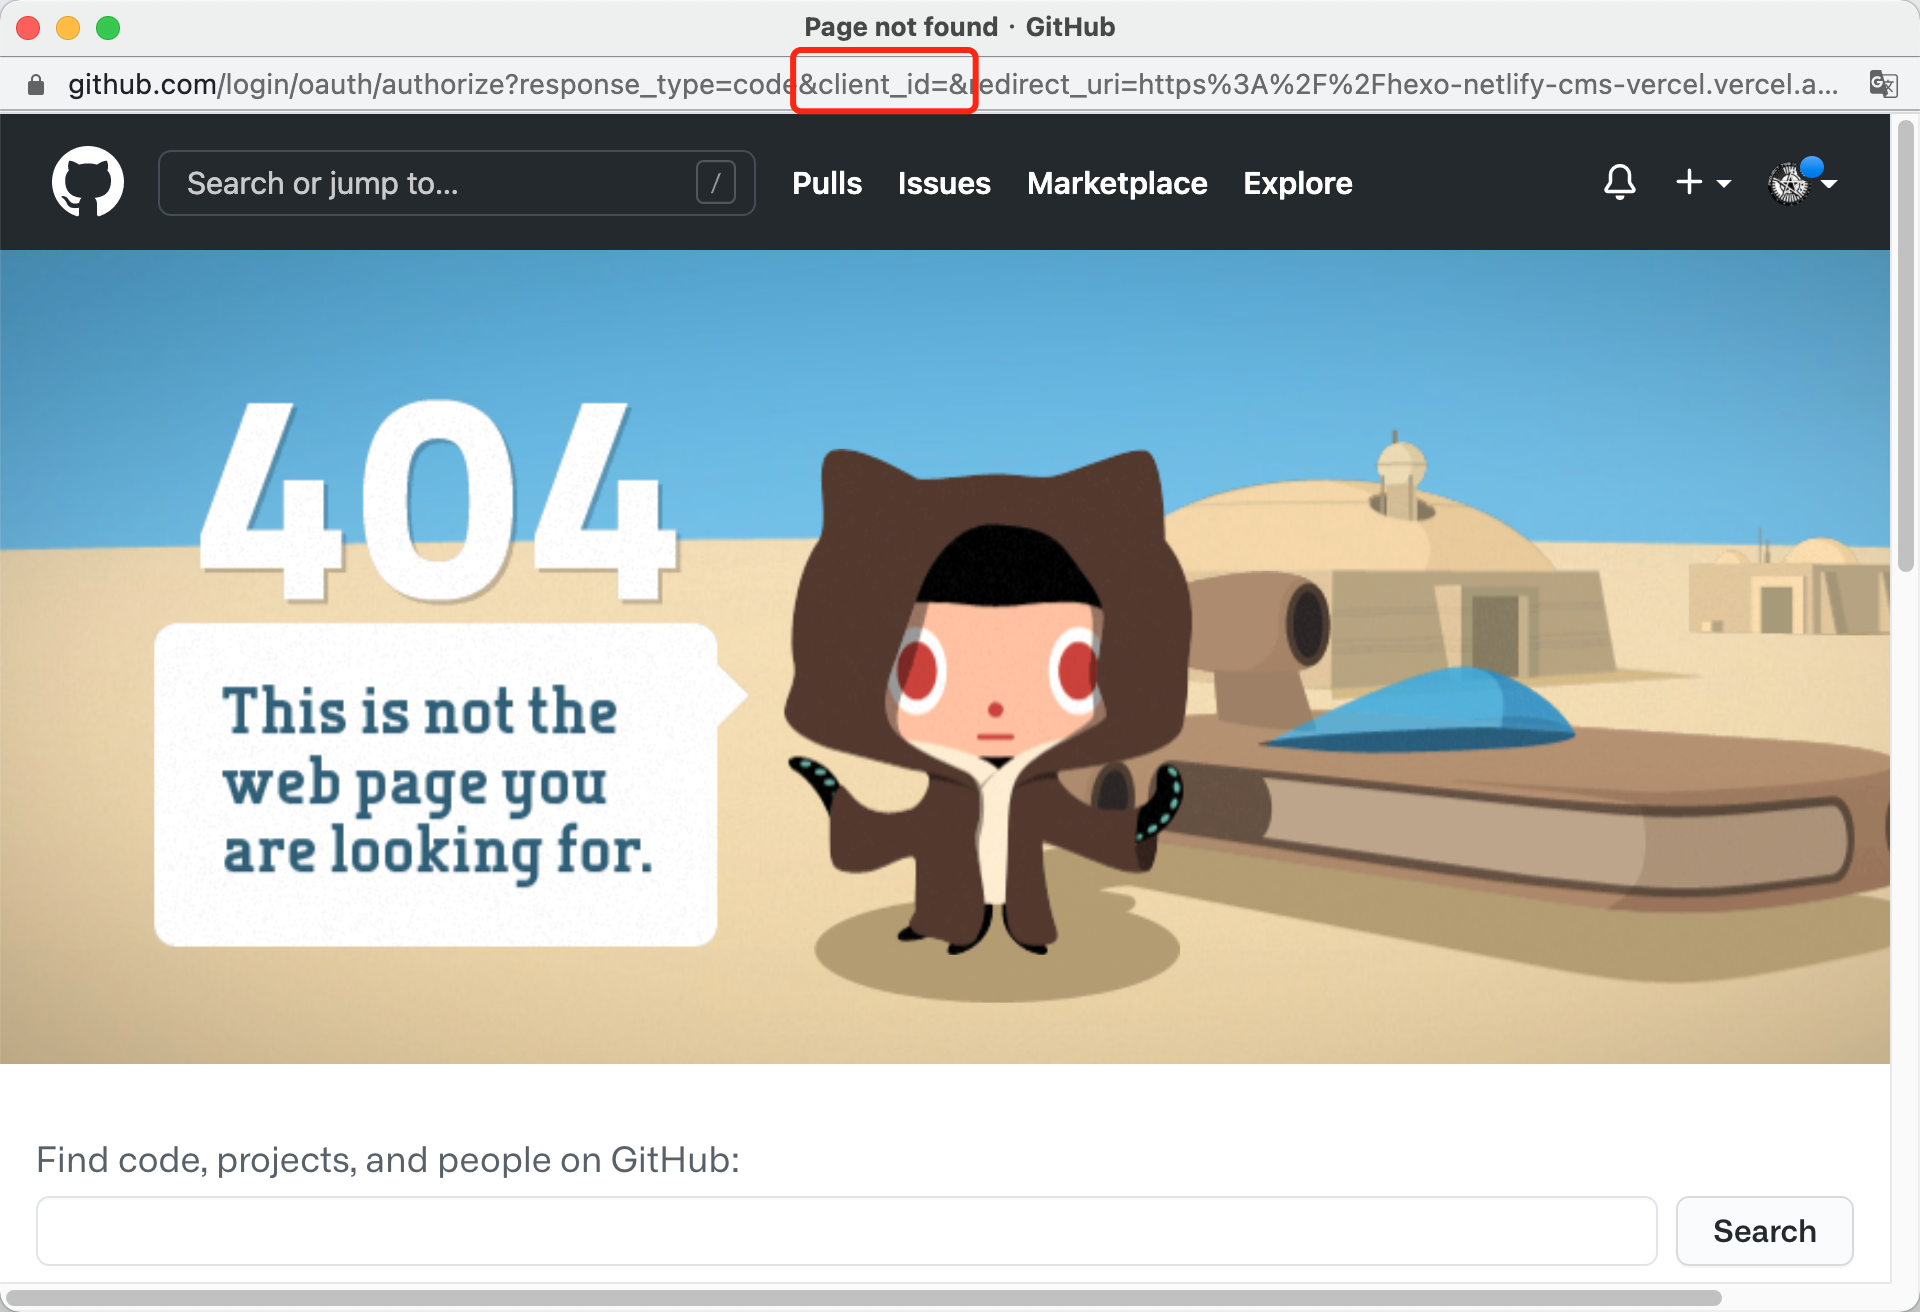
绑定oauth
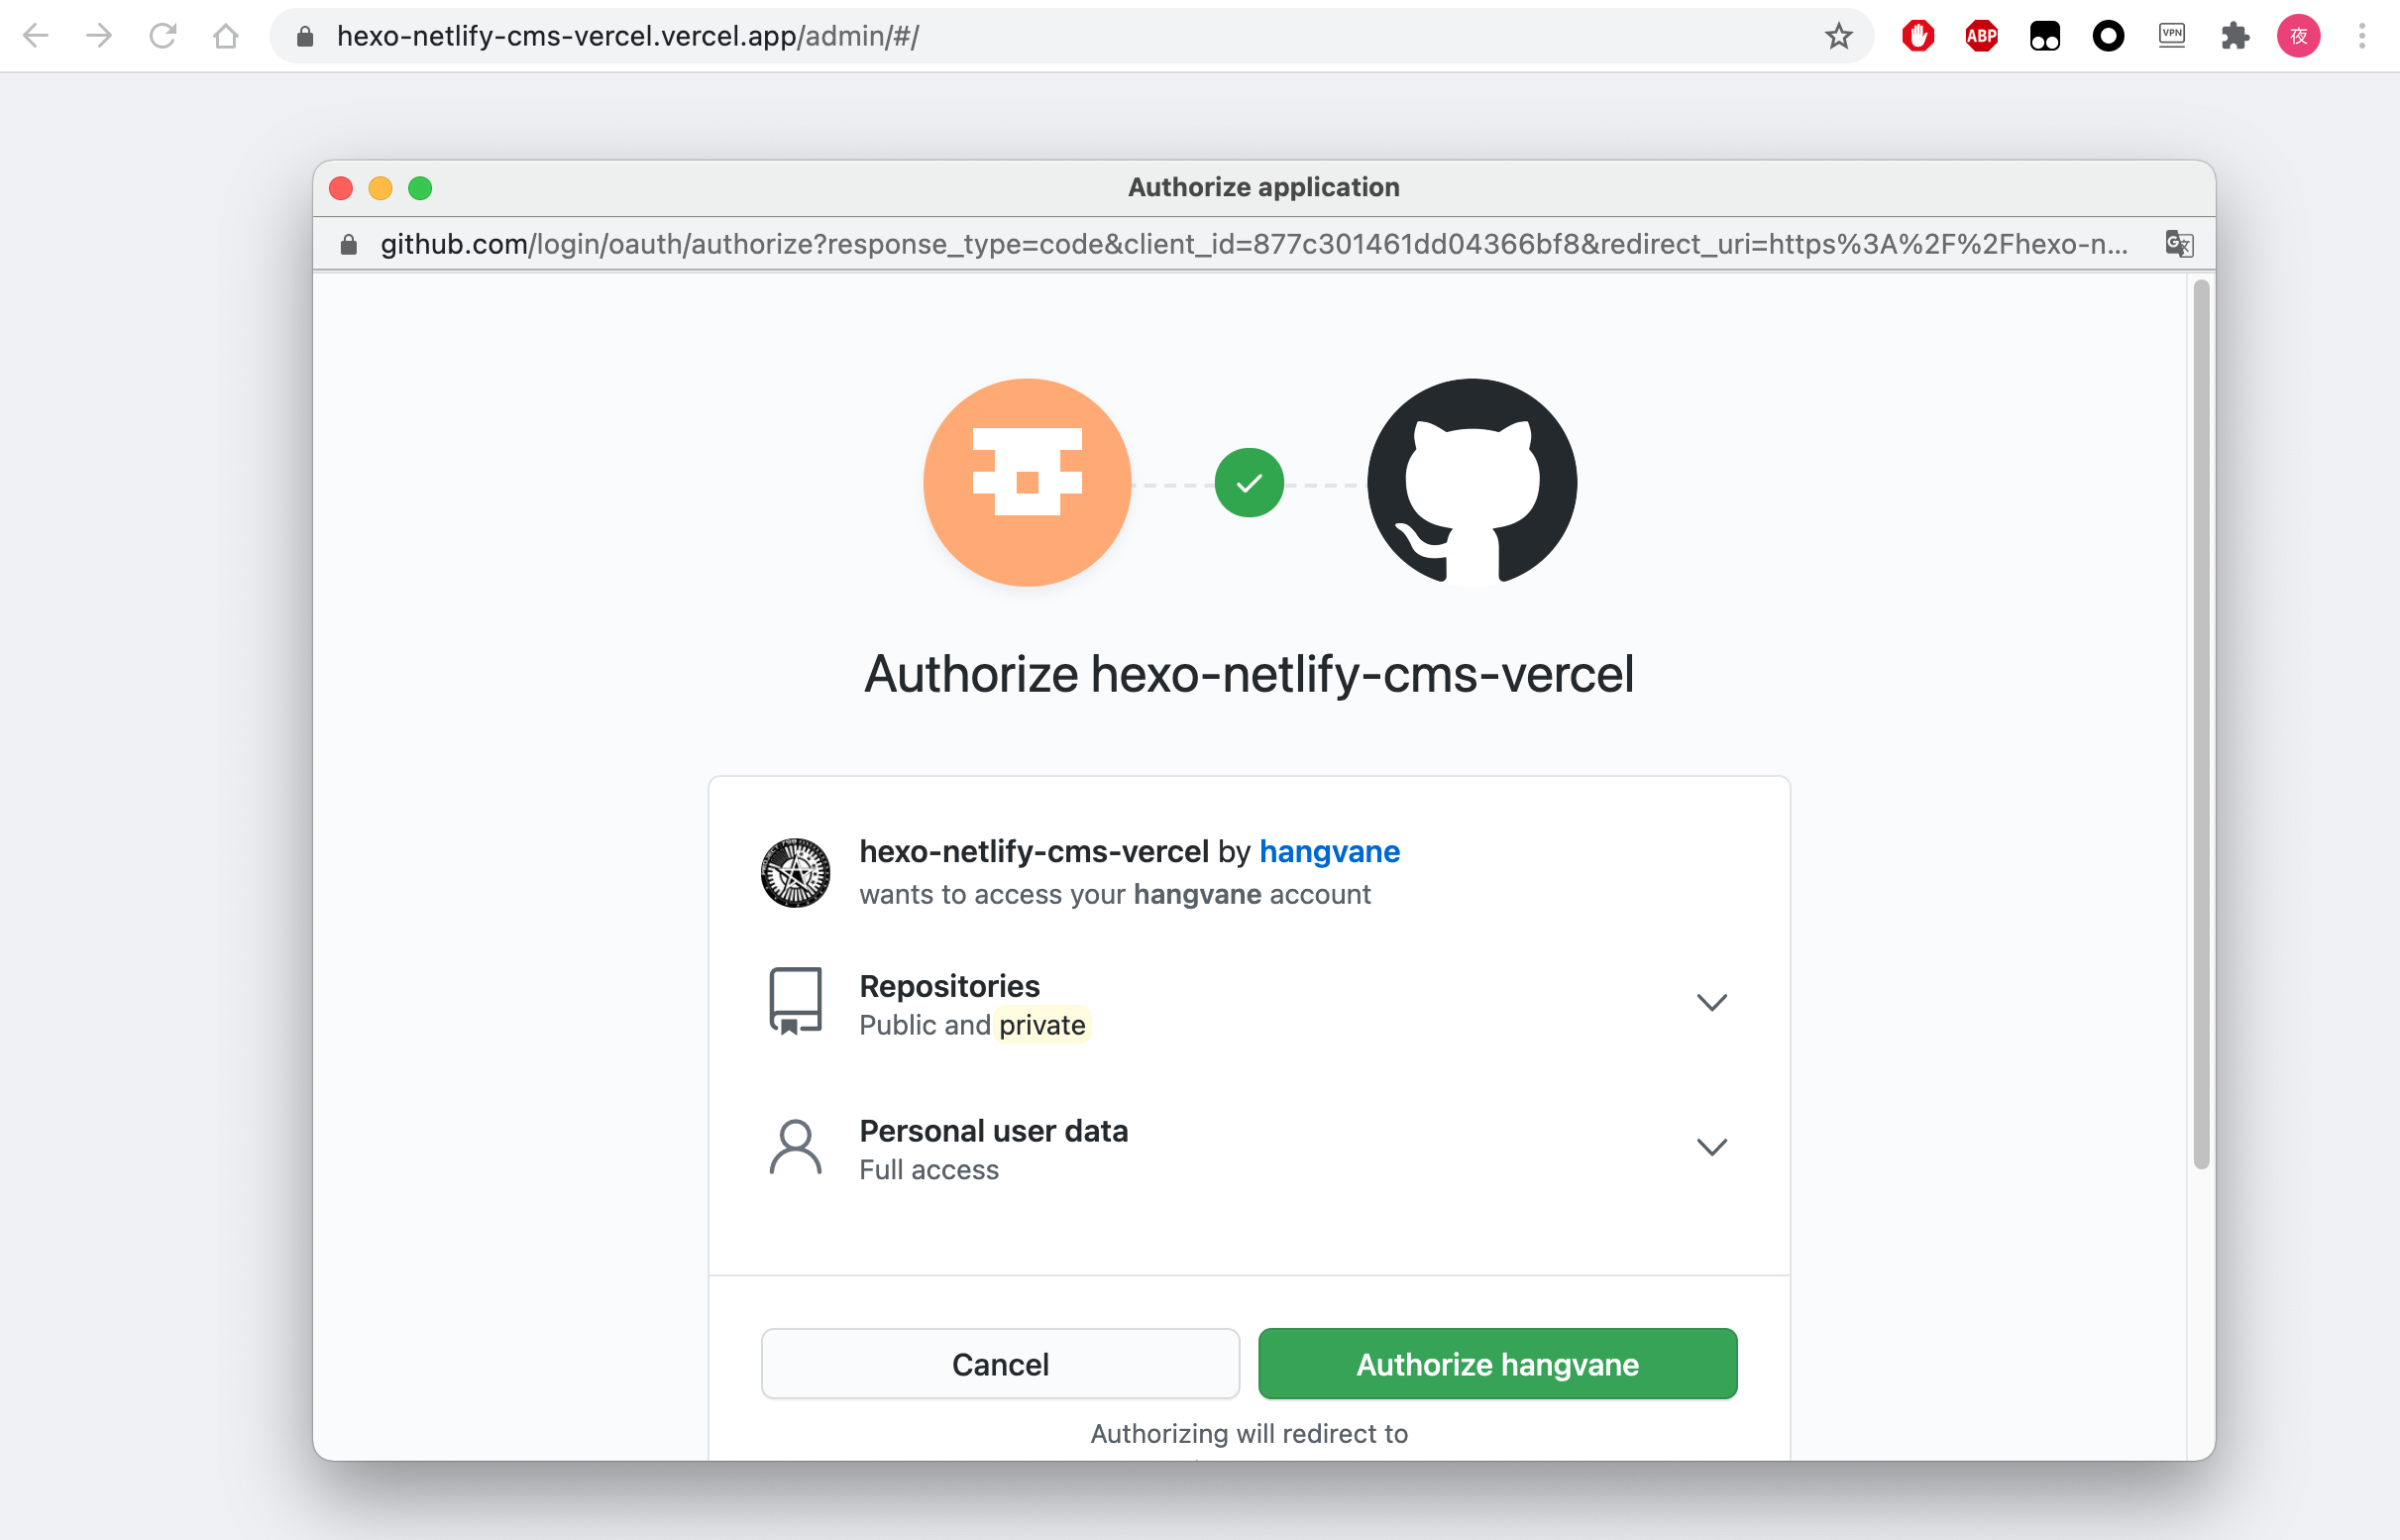
从 https://github.com/settings/developers 创建一个oauth,其他项任填,重点是Authorization callback URL 必须为http://<domain>.vercel.app/callback
之后点击生成一个secret,在 Vercel >> 你的项目 >> Project Settings >> Environment Variables创建两个Plaintext类型的环境变量
分析lib/config.ts可以发现,需要为oauth设置两个环境变量分别为OAUTH_GITHUB_CLIENT_ID和OAUTH_GITHUB_CLIENT_SECRET,他们的值分别为刚创建的Github oauth中的ID和secret
环境变量创建完成后,在Github上提交一次无谓的修改(如加一行空格)触发自动构建
之后可以访问https://<domain>.vercel.app/admin/,登录成功。
登录后测试功能是否正常,判断标准:
- 可以看到已有的文章.md
- 点开修改后可以成功保存
此时的优点是可以自动创建分支,自动构建分支,供自己预览:
定制404页面
在Github仓库中添加source/404.html,源代码:
1 | |
并在/_config.yml中跳过对其渲染
1 | |
模板
该模板已实现vercel上部署Hexo结合Netlify-CMS。
该模板为Hexo默认主题,已结合Netlify-CMS和身份验证器,基于此模板只需遵循如下步骤即可搭建完成:
点击
Use this template将此模板fork为自己的仓库(可私有)修改
/source/admin/config.yml. 将backend.repo和backend.base_url修改为自己的对应值前往 Github Developer applications 创建一个新的验证应用。其他项任填,重点是
Authorization callback URL必须为http://<domain>.vercel.app/callback前往 https://vercel.com/new 导入仓库并新建项目。在导入流程中点
Deploy,添加环境变量OAUTH_GITHUB_CLIENT_ID和OAUTH_GITHUB_CLIENT_SECRET,将它们的值设为上一步生成的值点击
Deploy等待部署完成如果你想更改 Vercel 提供的域名或绑定第三方域名, Settings > Domains.
打开
https://<domain>/admin/并登录 Netlify-CMS 后台,注意URL中最后一个/符号不能省略测试一下 Netlify-CMS 是否正常工作
如果需要Netlify-CMS提供的草稿预览功能,也就是在单击
save后提供一个文章的预览链接,则还需要链接到 Netlify 服务。这个过程和绑定Vercel很类似,但是不需要设置环境变量,因为不从Netlify这一侧进行文章的更新,只是利用它的预览功能部署成功!
已知问题
- Vercel部署下,输入
https://<domain>.vercel.app/admin会跳转错误从而报错,URL末尾必须加/ - Netlify-CMS的markdown编辑器有一些bug,使用
---分隔符和#标时尽量上下各空一行,避免.md文件生成错误
本博客所有文章除特别声明外,均采用 CC BY-SA 4.0 协议 ,转载请注明出处!